I filled a holiday order today for three of my wristlet purses. I was hesitant to approach my sewing machine, but all is well [we parted ways a month or so ago] and these are packaged and ready.
The "customer" wanted specific colors, but no specific patterns, so I just went with what I had on hand. Next up, I thought I would package them so she wouldn't have to worry about the gift wrapping duty on her end.
I bagged each wristlet purse in a cello bag with some silver shred and holiday ribbon. To finish each one, I used my Tree Trimming Trio stamp set from PTI to make tags. I kept things simple and added some stitching as the last detail. I can't say I've ever stamped a blue Christmas tree before, but I thought they looked cute enough.
Here are the trio of wristlets... first, red + white:
Monday, November 30, 2009
Friday, November 27, 2009
Organizer Tuck-Ins
Thursday, November 26, 2009
One of Many
One of the many ideas floating around in my head right now is this fabric stationery organzier. So, today while we had some "free" family time, I put together this design based on my own concept, which, as you will see, is a very simple one.
A little while back, I bought a package of blank, pre-folded Christmas cards made by Making Memories, along with some patterned paper and a few embellishments from the same "Mistletoe" line. My idea was to give a set of pre-designed cards (with envelopes) in this stationery organizer so that the recipient could use them for Christmas notes, letters or thank yous.
Here's a close up the tag design for the front cover. It is removable, being hung by a tiny gold safety pin. I tried to use as much from my own stash as possible. The patterned paper is from Making Memories and the felt tree is from Hero Arts. I added the "candy-striped" beads using red thread and a sewing needle. The stamped sentiment was made using Stampin' Up ink and the Signature Greetings stamp set from PTI. Their stamps impress wonderfully on muslin. The images remain crisp and clear.
And here's a picture of the inside which shows two pockets designed to hold 4 cards and 4 envelopes, for a total set of 8. I also added a length of twill tape (which I later decided needed to be sewn on the outside) to be used to tie the organizer shut.
Once it is closed and tied in a pretty bow it measures approximately 5" x 7".
Nothing too complicated going on here, and if I had to do it all over again, I would have loved to add a spritz of Glimmer Mist over a snowflake stencil. Maybe I'll give that one a try next time!
Wednesday, November 25, 2009
A Few New Favorites
I was inspired by this tree stamp image from Memory Box when I saw it the other day at my local rubber stamp store. Being there reminded me so much of why I so enjoy shopping at Mom & Pop stores rather than the big box stores....there is inspiration everywhere. I found several new things.
Here's the close up of a card I made this morning using my new rubber stamp along with the "thankful" sentiment from PTI's "Rustic Branches" set.
Isn't this patterned paper so pretty? It's from a company called "graphic 45" which was also new to me.
Here's the close up of a card I made this morning using my new rubber stamp along with the "thankful" sentiment from PTI's "Rustic Branches" set.
Isn't this patterned paper so pretty? It's from a company called "graphic 45" which was also new to me.
Tuesday, November 24, 2009
One of my Favorite Gifts
One of my favorite little gifts to give is homemade bread. I made these little loaves on Sunday to give out to my teachers at school. I thought they would be perfect little breakfast treats or simply something for them to tuck into their freezers to snack on later.
My original plan was to sew up a few bread bags but I ran out of time. So, last night I prettied up the loaves using some freezer paper (love that stuff), twine and a few scalloped circles in patterned paper from Making Memories Autumn Splendor.
I also used a Spellbinders tag die and a stamped image from PTI's Rustic Branches stamp set.
Sunday, November 22, 2009
Visiting the RAM
I'm sorry I've been a little absent lately.....I've been trying to concentrate on getting myself in better shape with a little help from this place, along with subbing many days while the teachers recuperate from a sick bug that's been going around our school for quite some time. (If they aren't sick, their kids are and they have to stay home to play nurse.)
Anyways, my hubby and I spent a delightful morning yesterday checking out the sites at our local arts market. Here's the logo with the name, but if you are a local, we simply call it the RAM.
Lots of really neat stuff there. I could have spent a good bit of money. One thing I did buy from a really sweet lady (we talked a good while about what kind of sewing machine I should purchase next) were these Bird-E Towels. Here's a neat picture I found on her etsy site.
And here's a shot (from her site again) of them all stacked up and tagged. I love her new logo!
I've been using barmop towels for quite a while as a way to reduce my paper towel usage. I really like them, but I am finding that after a bit of time, they tend to shred and leave lots of little fibers hanging around. Kerri assured me that these towels were super absorbent, fast drying and strong. I can't wait to try them out.
I also picked up a set of flannel cloths that I will use to tuck into lunchboxes instead of paper napkins. My youngest has been carrying a cloth napkin everyday in her lunch this year (she does not like the hot lunches at school so she brings a lunchbox almost every day) but I noticed they seem a little big for proportions. I think this size will be perfect.
I'm also working on a set of holiday stationery that I will photography today and get up for you to check out. And also, I may d-r-a-g out my dusty sewing machine (we got in a fight about a month ago and haven't "spoken" since) and work on a stationery holder to complete my gift set. No pattern here, I'm just going to "wing it" --- that means I'm going to ask my faithful engineer-of-a-husband to construct a pattern for me to play with. He's so good at it. Until then....
Thursday, November 12, 2009
Out of the Norm
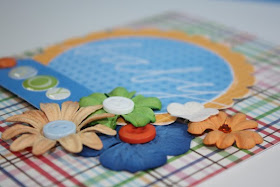
Well, I know you wouldn't usually put flowers on a baby boy's card for a shower, but I did. I found a really pretty picture of a similar card in an old "Cards" magazine and decided to go with it. (And, I must admit, I don't have too much baby boy stuff in the house.)
Here's what I came up with using some new patterned paper, a sheet of Bitty Box Basics paper from PTI and some of my favorite tone-on-tone BoBunny polka dot paper:
I also used my Spellbinders scallop and labels dies along with a Quickutz circle die. Next, I raided my flower jar, alphabet stickers and button stash.
Here's a close up:
I think the colors are so cheery. I might use them to make a gift card holder as well. See you later!
Wednesday, November 11, 2009
Thanks Kristina!
One of my most favorite blogs, and one that I visit daily is Kristina Werner's blog which can be found here. Her designs are so inspiring and her color schemes always amaze me.
One thing that she uses is a sketch organizer to hold her drawings. And, a little while back, she was gracious enough to give her readers [admirers] a free download to make our own organizer using her graphics. This is what I put together this afternoon to hold my personal sketches:
And here's the close up:
And here's the inside: (She designed it to hold card sketches done in a portrait design as well as a landscape design -- I wish I had 1/2 of her computer knowledge.)
I used some scrap patterned paper that was hanging around on my desk, along with my Labels One Spellbinders dies and a few Cuttlebug alphabet dies for the word "Card". The word "organizer" is stamped using PTI's Fresh Alphabet stamp set. I also used a PTI chocolate brown vintage button along with their fantastic rustic twine.
To bind my organizer I decided to use more the PTI rustic twine and a simple pamphlet stitch so that I could reuse my cover when my pages are full. Kristina used a long-reach stapler to join her book, but I don't have one. I'll put one on my wish list.
I can tell these are addictive and now I'm off to make a few more. Be sure to check out Kristina's site while she's doing some amazing Christmas card videos. Thanks!
Tuesday, November 10, 2009
When You're in a Pinch
When you need a quick card (I'm talking done and out of the door in 10-minutes or less) try out a card kit. Now, I'm not a huge fan of "kits" of any kind, scrapbook pages, etc., but I do have a few kits from Basic Grey in my stash for these last minute occasions. Here's one I made using the "Cupcake" birthday card kit: With kits, all of the complicated work is done for you....everything fits and coordinates so nicely. And, you can always add a few touches of your own design to whatever is included in the kit. In this case I added the numbers "21" to the balloon, as well as the bow and the black doodling around the edges.
Try out a kit today if you haven't already! They are great time savers. My latest addition includes the Nook and Pantry kit (as shown above)...I can't wait to dig in. Until next time,
Monday, November 9, 2009
Good Start to a Great Week
I'm back with some exciting news!! I peeked over at the Paper Crafts blog this morning and saw my name listed with two other gals as winners of this amazing prize....
I can't wait to get my hands on this juicy piece of yumminess....I even checked out the shipping for it last week when the blogs were promoting it. Now, I can't believe it will be arriving in my mailbox for FREE!! Yippee! What a great way to start the week!